Install and configure a new HCL Workload Automation agent
About this task
To install HCL Workload Automation in
a cluster-aware configuration, use the following procedure:
- Install the HCL Workload Automation agent:
- Select one node of the cluster. This node must be used for any subsequent operations (such as fix pack installations).
- Log on to the node by using a user with Domain Administrator privileges.
- Choose the Microsoft Virtual Server (for Windows 2008) or Clustered Role (for Windows 2012) where you want to install the HCL Workload Automation agent.
- Install HCL Workload Automation:
- Specify a domain user as user for which you want to install HCL Workload Automation
- Specify the shared disk that is associated to that Virtual Server (for Windows 2008) or Clustered Role (for Windows 2012) as destination directory
- Install HCL Workload Automation.
- Make the HCL Workload Automation cluster
aware:
- Run the Windows Command Prompt.
- Move into the HCL Workload Automation home directory (on the shared disk).
- Run tws_env.cmd to load the HCL Workload Automation environment variables.
- Run Shutdown.cmd to stop HCL Workload Automation.
- Move into the cluster directory.
- Run
the utility twsClusterAdm.exe to configure HCL Workload Automation remotely
on all nodes of the cluster and to install the HCL Workload Automation Cluster
Resource. See Example 1: First installation of HCL Workload Automation in a Windows cluster environment for
an installation example. Note: ITWSWorkstation is the name of the HCL Workload Automation cluster resource type. By default, when it is created by using the twsClusterAdm command line, the instance name is ITWSWorkstation_<domain_name>_<user_name>.Note: During HCL Workload Automation 9.4 Cluster installation, the following parameters must not be specified in double-byte character set (DBCS) characters:
- User
- Domain
- Define a new workstation object on the master domain manager either by using composer or the Dynamic Workload Console. Verify that the node name specified is resolved by the DNS and the IP address can be pinged from the master domain manager. If you are using end-to-end network configuration, you must specify the IP address that you specified for the NET/IP Cluster Resource Value.
- Start the ITWSWorkstation resource instance
that you created in step
2f:
- Locate the ITWSWorkstation resource instance:
- On Windows 2008 cluster:
- From the Failover Cluster Manager console,
find the File Server where the ITWSWorkstation resource
instance is saved.
In the Figure 1 example, the ITWSWorkstation_CLUSTER_aia86 resource instance is saved in the twsFS File Server.
- On Windows 2012 cluster:
- From the Failover Cluster Manager console, find the Role where the ITWSWorkstation resource instance is saved.
- Right-click on the selected ITWSWorkstation resource instance and select Bring Online.
Figure 1. File Server example on Windows Server 2008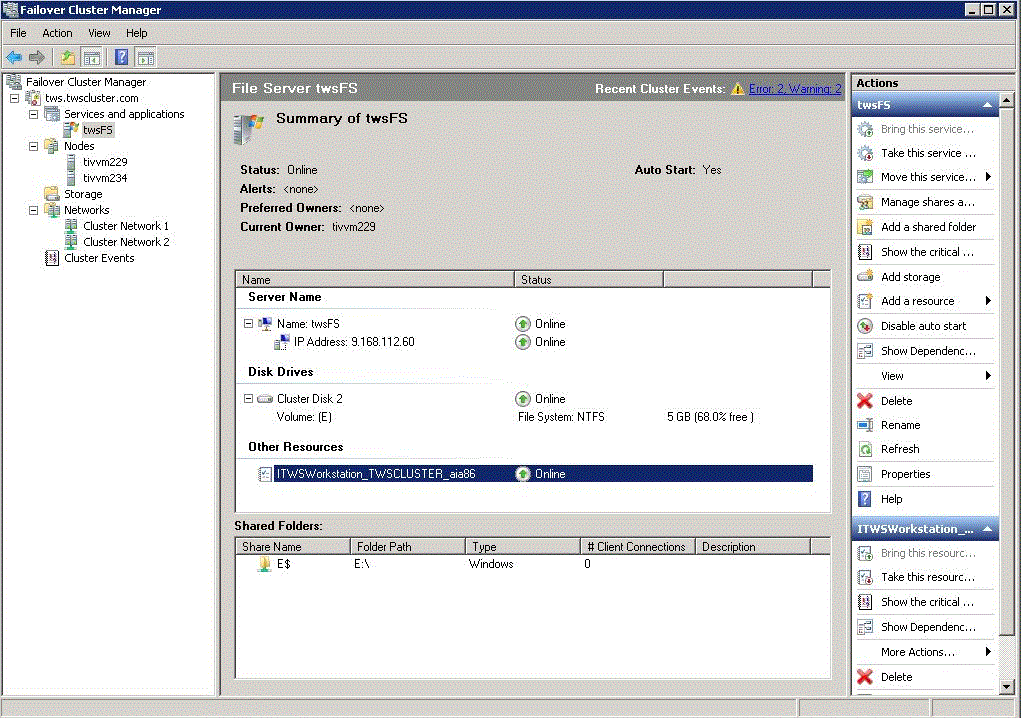
- Locate the ITWSWorkstation resource instance:
- Wait until the final job stream runs or generate a new plan to add the new workstation to the plan.