Installing and configuring the Tivoli Monitoring agent for HCL Workload Automation
Procedure to install the agent on Windows and non-Windows workstations.
About this task
Installing and configuring on Windows workstations
Before you begin
In a local environment, the Tivoli® Enterprise Monitoring server and Tivoli Enterprise Portal server must be installed on the same workstation as the HCL Workload Automation master domain manager. The Tivoli Monitoring agent for HCL Workload Automation is installed on the same workstation as the HCL Workload Automation master domain manager.
In a remote environment, the Tivoli Enterprise Monitoring server and Tivoli Enterprise Portal server are installed on different workstation than the HCL Workload Automation master domain manager. In this type of environment, you must first install the Tivoli Monitoring OS agent on the same workstation as the HCL Workload Automation master domain manager before installing the Tivoli Monitoring agent for HCL Workload Automation. When installing the OS agent, in addition to selecting the Tivoli Enterprise Monitoring Agent for your OS, select all of the associated subcomponents in the list.
Procedure
- The Tivoli Monitoring agent
for HCL Workload Automation is
listed in the Manage Tivoli Enterprise
Monitoring Services.

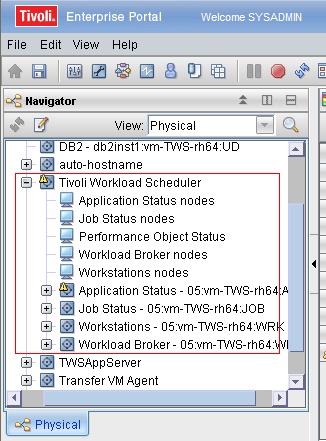
- Launch the Tivoli Enterprise Portal.
The agent is displayed in the Navigator pane together with any agent
configuration settings.
Installing and configuring on non-Windows workstations
Before you begin
In a local environment, the Tivoli Enterprise Monitoring server and Tivoli Enterprise Portal server must be installed on the same workstation as the HCL Workload Automation master domain manager. The Tivoli Monitoring agent for HCL Workload Automation is installed on the same workstation as the HCL Workload Automation master domain manager.
In a remote environment, the Tivoli Enterprise Monitoring server and Tivoli Enterprise Portal server are installed on different workstation than the HCL Workload Automation master domain manager. In this type of environment, you must first install the Tivoli Monitoring OS agent on the same workstation as the HCL Workload Automation master domain manager before installing the Tivoli Monitoring agent for HCL Workload Automation. When installing the OS agent, in addition to selecting the Tivoli Enterprise Monitoring Agent for your OS, select all of the associated subcomponents in the list.
About this task
Procedure
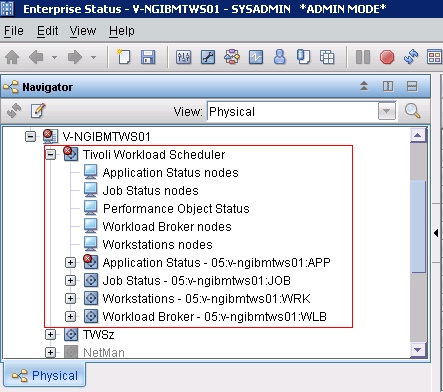
- Launch the Tivoli Enterprise Portal.
The agent is displayed in the Navigator pane together with any agent
configuration settings.